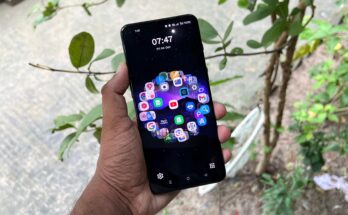
Do you want to personalize your phone’s incoming calls with stunning photos of your friends, family, or even your favorite celebrities? If yes, you’re in the right place! In this article, we’ll show you how to set a photo on every incoming call—and the best part? It’s super easy and requires no technical knowledge!
Whether you want to see your loved one’s smiling face whenever they call or just want to upgrade your calling screen’s look, we’ve got you covered. Let’s dive into this complete guide to customizing your incoming call screen with photos.
🔍 Why Set a Photo on Incoming Calls?
Before we jump into the how-to steps, let’s quickly look at why this feature is becoming so popular:
- 🎨 Customization: Give your device a unique, stylish look.
- 💖 Emotional connection: See your loved ones when they call.
- 😂 Fun: Add funny or meme photos for certain friends.
- 🧠 Memory aid: Helps you remember who’s calling, especially for people you don’t talk to often.
📱 Best App to Set Photo on Incoming Call – “Full Screen Caller ID”
One of the easiest and most popular ways to set photos on incoming calls is by using an app called Full Screen Caller ID. It’s available on the Google Play Store, free to use, and super easy to set up.
🛠️ How to Set a Photo for Incoming Calls (Step-by-Step)
Follow these simple steps to personalize your incoming calls:
📌 Step 1: Install the App
- Go to the Google Play Store.
- Search for Full Screen Caller ID.
- Tap Install and open the app.
📌 Step 2: Grant Permissions
- The app will ask for permissions like access to contacts, photos, and phone calls.
- Tap Allow to make sure the app works properly.
📌 Step 3: Set the Default Settings
- Open the app and go to Settings.
- Enable Full Screen Incoming Call.
- Enable Set Contact Image.
📌 Step 4: Choose a Contact and Set a Photo
- Tap on Contacts inside the app.
- Choose the person you want to set a photo for.
- Tap on Edit Image or Set Image.
- Choose an image from your Gallery or take a new one.
- Adjust and save it.
That’s it! Now, whenever that person calls you, their photo will appear on your full screen.
🌟 Bonus Features of the Full Screen Caller ID App
- 📷 Full-screen caller photos
- 🎨 Custom themes
- 🔊 Custom ringtones
- 🧩 Supports dual SIM
- 🌐 Works offline
This app is lightweight, easy to use, and doesn’t slow down your phone.
🤔 Can You Set Photos Without an App?
Yes, you can, but it’s limited.
📲 On Most Android Devices:
- Open Contacts.
- Tap on a contact you want to edit.
- Tap the Edit or Pencil icon.
- Tap the Camera or Gallery icon.
- Choose the photo and save.
But remember, this method only shows a small thumbnail image, not full screen. That’s why using an app like Full Screen Caller ID is the better choice for a more visual and attractive look.
💡 Tips for Best Results
- Use high-quality, vertical images for full-screen display.
- Choose bright and clear photos.
- Update images regularly to keep things fresh.
📥 Download the App Now & Start Customizing!
Don’t wait—make your incoming calls exciting and personalized today. Here’s the download link again:
📝 Final Thoughts
Customizing your incoming calls with photos is a fun and simple way to make your phone feel truly yours. Whether you use it for functionality or aesthetics, apps like Full Screen Caller ID can completely transform your call experience.
If you found this guide helpful, don’t forget to share it with your friends and drop your questions or suggestions in the comments!
🔎 SEO Keywords You Can Rank For:
- How to set photo on incoming call Android
- Full screen photo caller ID
- Set caller photo full screen
- Best incoming call screen app
- Customize call screen Android
- Caller ID photo set
- Full screen caller photo app

